Localization of API Portal
14 minute read
Change API Portal language
You can change the API Portal UI texts from the default English to another language.
Install a language
User interface strings are stored in language-specific resource files. To add these resource files for a new language, you must install the language.
-
In the Joomla! Admin Interface (JAI) left menu, click System > Languages in the Install card.
-
Find and select the language to install, and click Install.
-
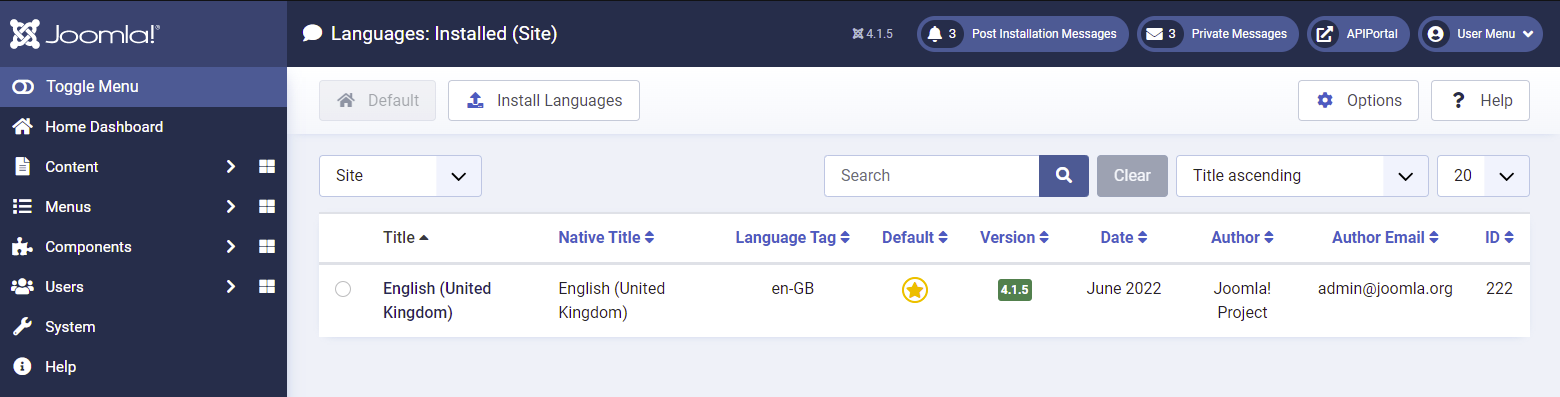
After the installation is finished, click System > Languages in the Manage card and ensure that Site is selected at the top of the page.
-
To set the installed language as the default language of your API Portal, click the star button in the row for that language.
Tip
You can change the default language of JAI independently from your API Portal. Select Administrator on the Languages: Installed page and click the star button in the row for the required language. You can also select any of the installed languages when you log in to JAI.
Add API Portal UI strings to the installed language
API Portal UI strings are not included in the installed language resource files, so you must add the required strings for the new language.
The UI strings are stored in initialization (.ini) files. Each language has its own .ini file that control the UI text shown in API Portal. By default, the API Portal UI strings are included only in the English (en-GB.com_apiportal.ini file). To change the language shown in API Portal, you must have a translation of the English .ini file for that language.
Add a translated UI string file
All File upload sections have a link from which you can download the English version of the file. After that, you just need to translate the strings and upload the new file. You must ensure that the extension of the file is .ini, otherwise the upload will fail.
To upload language files:
-
In JAI, click Components > API Portal > Additional Settings.
-
Enable Upload language file toggle. The following options are shown:
- Language: Select the language for which you are uploading translations. All installed languages except English are listed.
- Language files context: Select whether the uploaded language files are for the Site or Administrator part of API Portal.
- API Portal component language file: The main language file for API Portal component.
- Overridden language file: Some texts in API Portal, such as the messages on the login pages, are stored in different filed and you must change and upload them separately.
sys.inilanguage file: This options is shown only when Administrator is selected as a language files context. This language file contains translations for the administrator components menu drop-down, menu, and component parameters.
-
Click Save & Close.
To translate labels or values of custom properties, you must add a new row to the translation .ini file, with the desired key/value pair, and ensure that the value of the key is in capital letters. For example, to translate a custom property with label “Environment” to French, add the following line to the translation file: ENVIRONMENT="Environnement".
Provide API Portal in multiple languages
You can provide API Portal in multiple languages at the same time to cater for your API consumers from different countries. The API consumers can use language-specific URLs to access API Portal in their own language.
Unlike when localizing API Portal to a single language, you are not simply substituting the language with another one. Instead, when providing several language versions of your API Portal, you must duplicate the API Portal elements and content for each language in addition to changing the UI texts.
You do not have to install a language to Joomla! before configuring the required components. However, it might help you to find the correct details when configuring a language.
Add a new content language and main menu
To add a new content language and main menu, follow these steps:
-
In the JAI left navigation menu, click System > Content Languages.
-
Click New to add a new content language.
Note
If you have already installed a new language, a corresponding content language will already exist for that language and you can skip steps 3 to 7, and continue from step 8. -
On the Details tab, enter the Title and Title Native for the new language. The titles can be the same.
-
Enter the Joomla! Language Tag. Ensure that you enter the tag in the correct format. You must use “
-” instead of “_” (for example,fr-FR). -
In URL Language Code, enter the language identifier to use in the language-specific URL (for example,
fr). The identifier must be unique for each language. -
Set Status to Unpublished, and click Save & Close. For more details on the parameters, see the tutorial for Joomla! Language Switcher.
-
In the JAI left menu, click Menus > Manage > New.
-
In Title, enter the title to be shown in drop-down lists (for example,
Main menu (fr)). -
On the Menu Details tab, in Menu Type, enter a system identifier for the new main menu (for example,
mainmenufr). -
Click Save & Close.
Clone the main menu items
You must duplicate the API Portal main menu for each language.
- In the JAI left menu, click Menus and select the main menu to clone.
- To clone all the menu items at once, click the Check All Items check box and click Batch.
- In Set Language, select the correct content language.
- In To Move or Copy, locate the correct main menu for the language and select Add to this menu.
- Select Copy to make a copy of the menu items.
- Click Process.
- In the JAI left menu, click Menus and select the main menu you cloned the menu items to.
- To set the default home page, click the star in the row for the Home menu item.
- To rename the cloned menu items, click each menu item to edit it, and change Menu Title to the correct translation (for example,
Home(2)toAccueil). - Click Save & Close.
- Repeat for each menu item.
Duplicate the page template styles
You must duplicate your page template styles for each language. API Portal versions before November 22 ship with the Purity III template style by default, while API Portal installations from November 22 onwards, ship with the T4 Page Builder template by default.
Use the T4 Page Builder template
Follow this section to use the T4 base template:
-
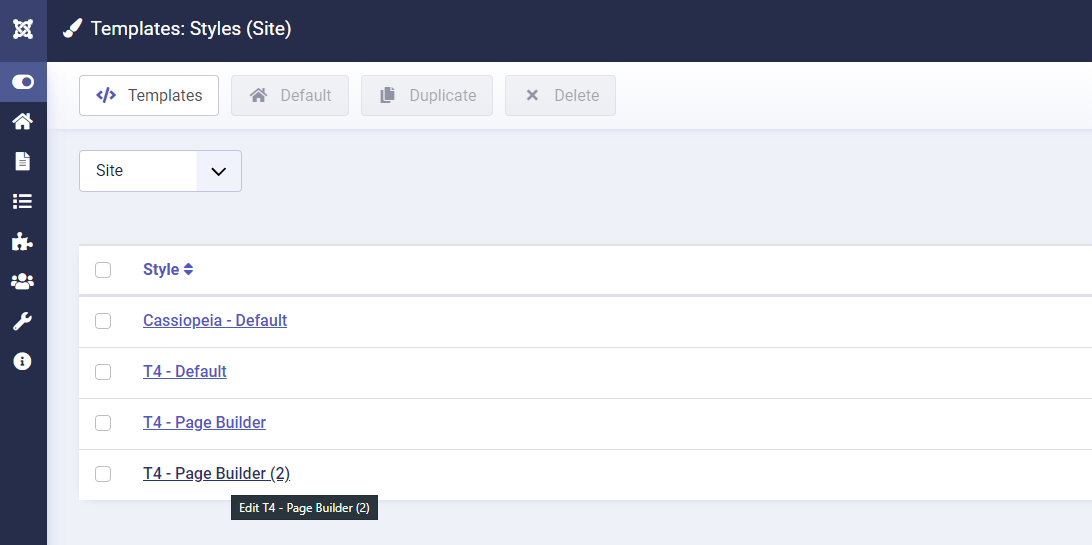
In JAI, from the left navigation menu, click System > Site Template Styles from the Templates card. The following image shows the Site Template Style list:
-
Select T4 - Page Builder from the list, then click the Duplicate button.
-
Click the newly duplicated style (This opens the T4 style editor).
-
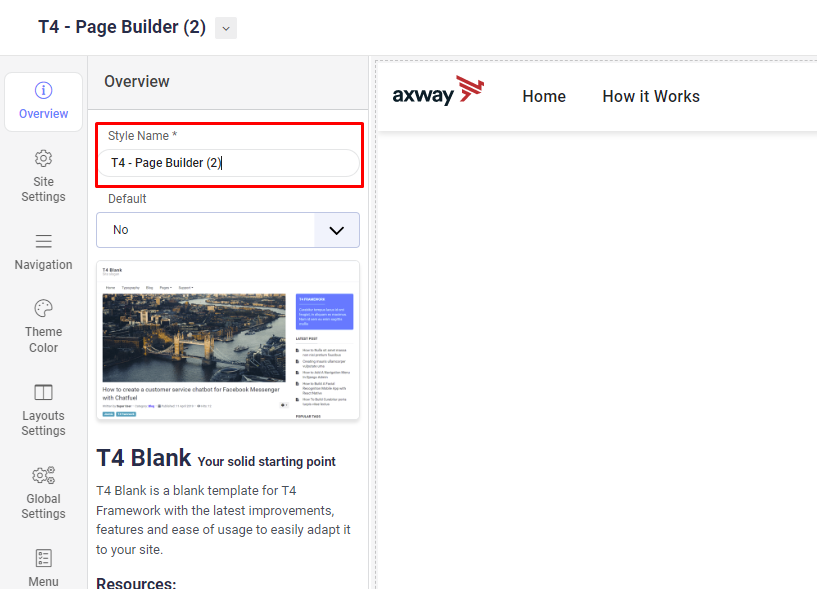
From the left navigation menu, click Overview, then change the name of the style to something informative. The following image shows the T4 Page Builder style editor:
-
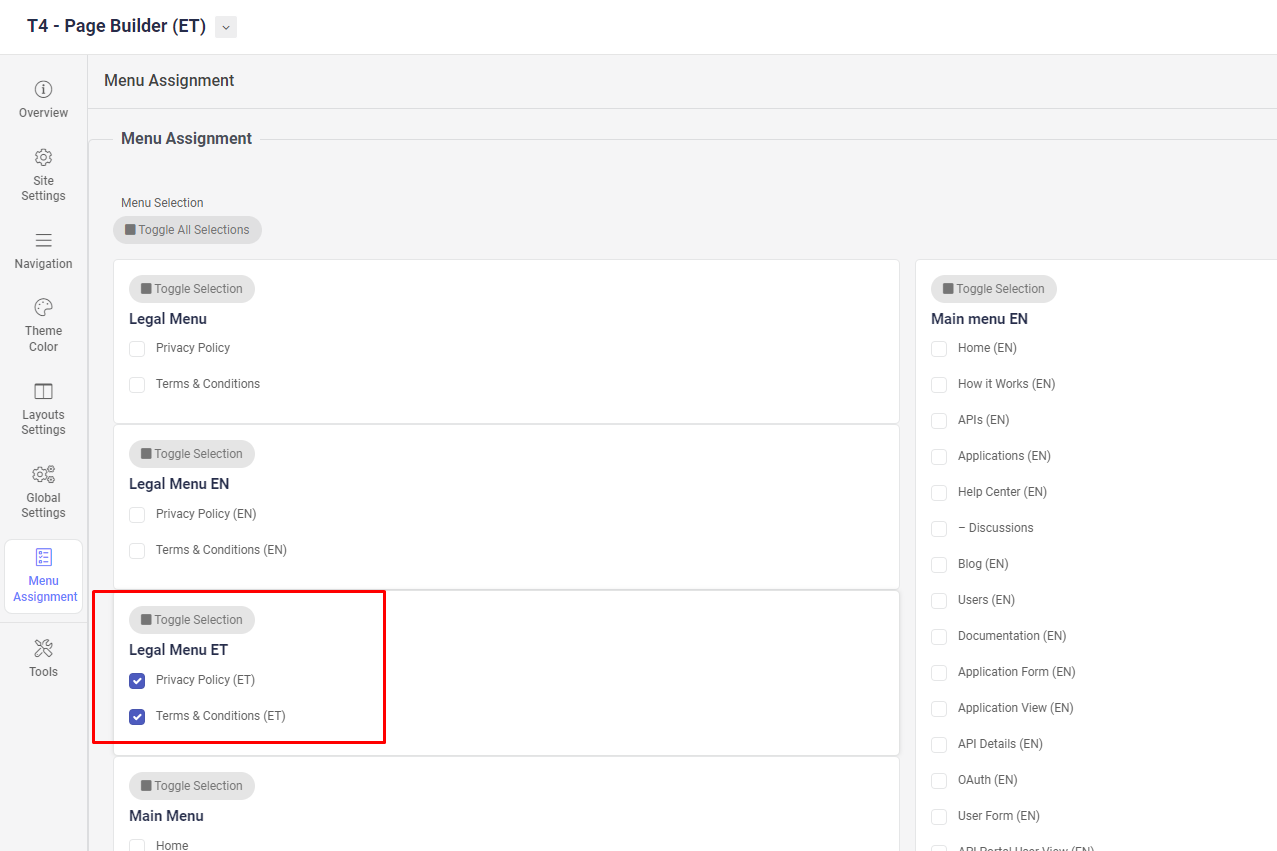
From the left navigation menu, click Menu Assignment, then select the menu items for the Legal Menu of the corresponding language. The following image shows the T4 Page Builder legal menu assignment.
-
Click the down arrow of the Save button, then click Save & Close.
Use T4 API Portal default template
-
In JAI, from the left navigation menu, click System > Site Template Styles from the Templates card.
-
Select T4 - Default from the list, then click the Duplicate button.
-
Click the newly duplicated style (This opens the T4 style editor).
-
From the left navigation menu, click Overview, then change the name of the style to something informative.
-
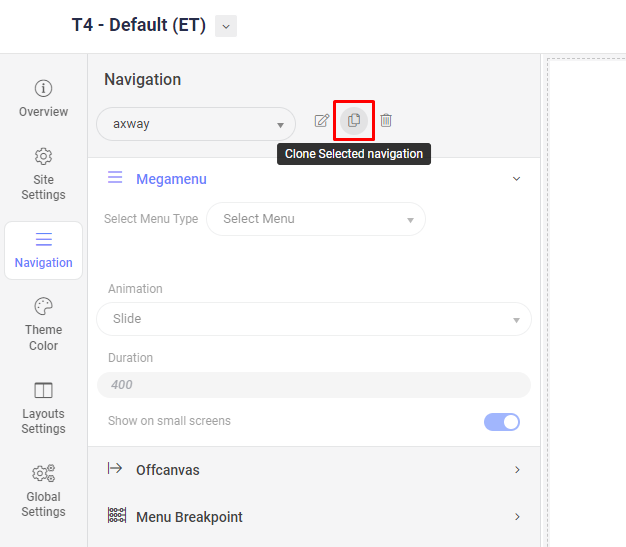
From the left navigation menu, click Navigation, then click Clone selected navigation. The following image shows the Navigation screen.
-
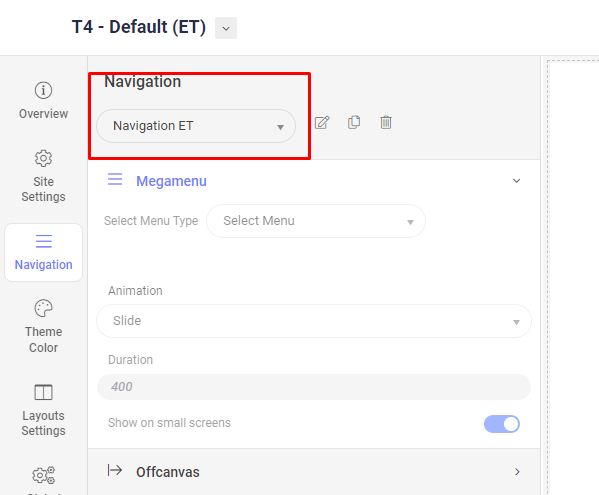
Enter a name for the newly cloned navigation and click the Save button. The following image shows the cloned navigation:
-
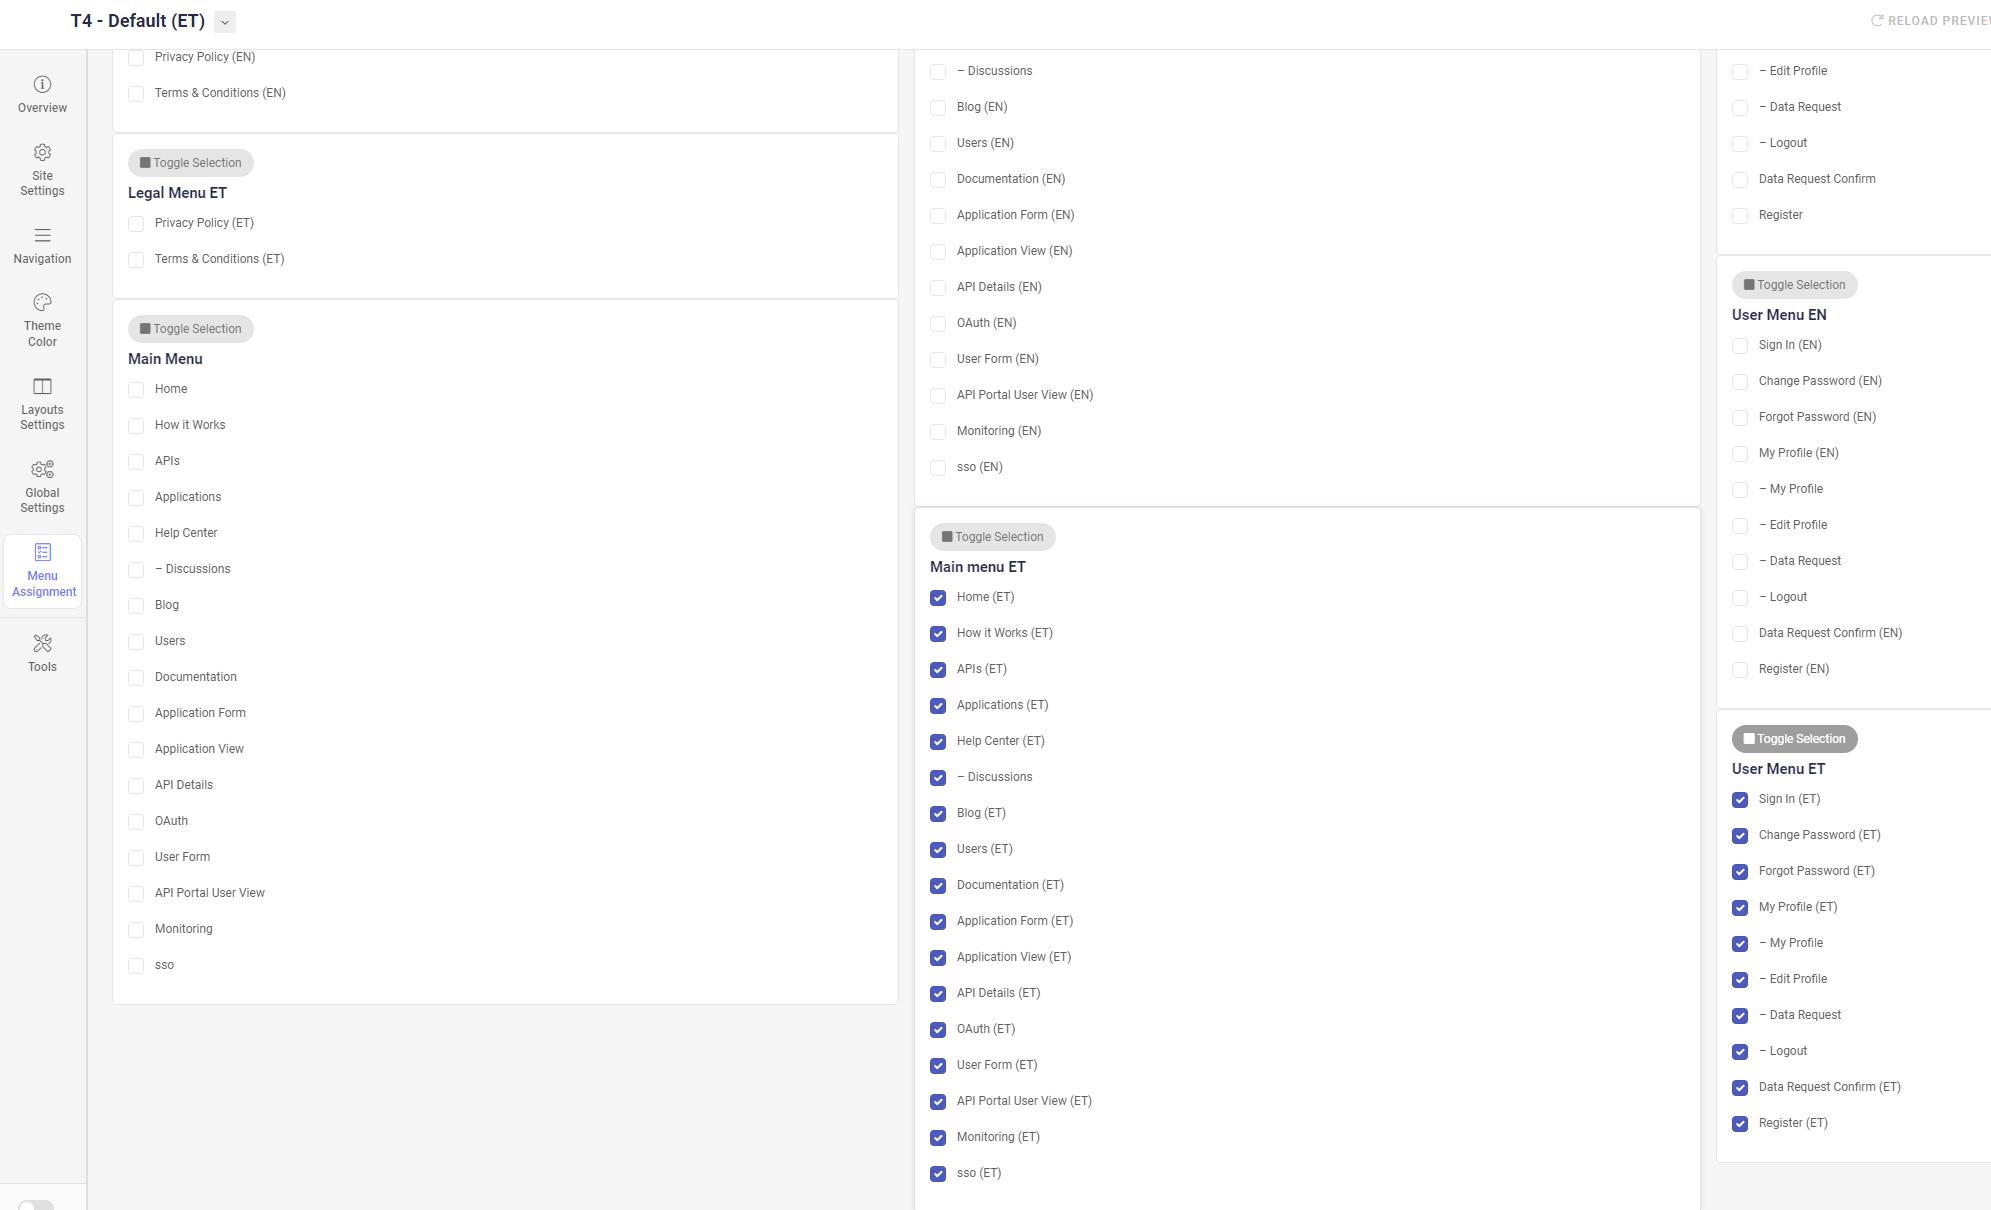
From the left navigation menu, click Menu Assignment, then select the menu items for the main menu and the user menu of the corresponding language.
-
Click the down arrow of the Save button, then click Save & Close.
Use the Putity III
- In the JAI left navigation menu, click System > Site Template Styles.
- Click your template style (for example,
purity_III - Default) to open it. - Click the arrow next to the Save button at the top left of the window, and select Save as Copy.
- Edit the Style Name to indicate the language (for example,
purity_III - fr). - Select the respective language as the Default. This sets this template as the default for pages using the selected language.
- Click the Navigation tab and change the Menu to the correct main menu for the language.
- Click the Assignment tab and assign the menu items from the correct language to the template. To select or deselect all menu items, click the toggle button next to the main menu title.
- Click Save & Close.
Duplicate the homepage template style
You must also duplicate your homepage template style for each language.
- In the JAI left navigation menu, click System > Site Template Styles.
- Click apiportal-homepage template style to open it.
- Click the arrow next to the Save button at the top left of the window, and select Save as Copy.
- Edit the Style Name to update the name of your new homepage.
- Click the Navigation tab and change the Menu to the correct main menu for the language.
- Click the Assignment tab and select only Home from the Main menu of the correct language.
- Click Save & Close.
Create homepage modules for the new language
On the Home page layout there are available positions where you can add modules. When installing a new language, it is a common practice to duplicate the Home Page Banner and the Home tiles modules, and translate them for the new language. To create a new module:
- In the JAI left menu, click System > Site Modules and click New.
- Select module type (for example, Home Page Banner).
- Select Position (for example, api-home-banner).
- For the Language, select the new installed language.
- On the Menu assignment tab, select Only on the pages selected from the Module assignment list.
- Select the Home page of the new language from the Menu selection field.
- Click Save & Close.
Publish additional languages
- Ensure that you have completed all the steps described in Change API Portal language for each language you want to publish.
- In the JAI left navigation menu, click System > Content Languages.
- Ensure that the Status for all the languages you want to publish is set to Publish.
- In the JAI left menu, click System > Plugins, and ensure the System - Language Filter plugin is enabled.
- Open your API Portal home page in a browser, and change the language code in the URL to one of the languages you have published. For example, change
https://<your API Portal URL>/en/tohttps://<your API Portal URL>/fr/. You are redirected to the API Portal home page in that language.
Provide a language switcher
You can provide API Portal in multiple languages, and enable your API consumers from different countries to change languages using a language switcher.
To enable a language switcher, you need to have a main menu for each language you are providing (including one for English), and an additional main menu for all languages. Similarly, you need to have template styles for each language (including one for English), and an additional template style for all languages.
Install new languages
To install new languages, follow these steps:
- In the JAI left menu, click System > Languages in the Install card.
- Find and select the language to install, and click Install.
- In the JAI left navigation menu, click Language(s) > Content Languages.
- Set the Status of the new language to Published.
Create main menus
To enable a language switcher, you need to have a main menu for each language you are providing (including one for English), and an additional main menu for all languages.
After following this process you will have the following main menus:
- Main menu - All
- Main menu - FR
- Main menu - EN
Create a main menu for all languages
First, create a main menu that will be the default main menu for all languages. This main menu will have only one menu item.
-
In the JAI left menu, click Menus > Manage > New.
-
In Title, enter the title to be shown in drop-down lists (for example,
All Menu Items). -
On the Details tab, in Menu Item Type, enter a system identifier for the new main menu (for example,
mainmenuall). -
Click Save & Close.
-
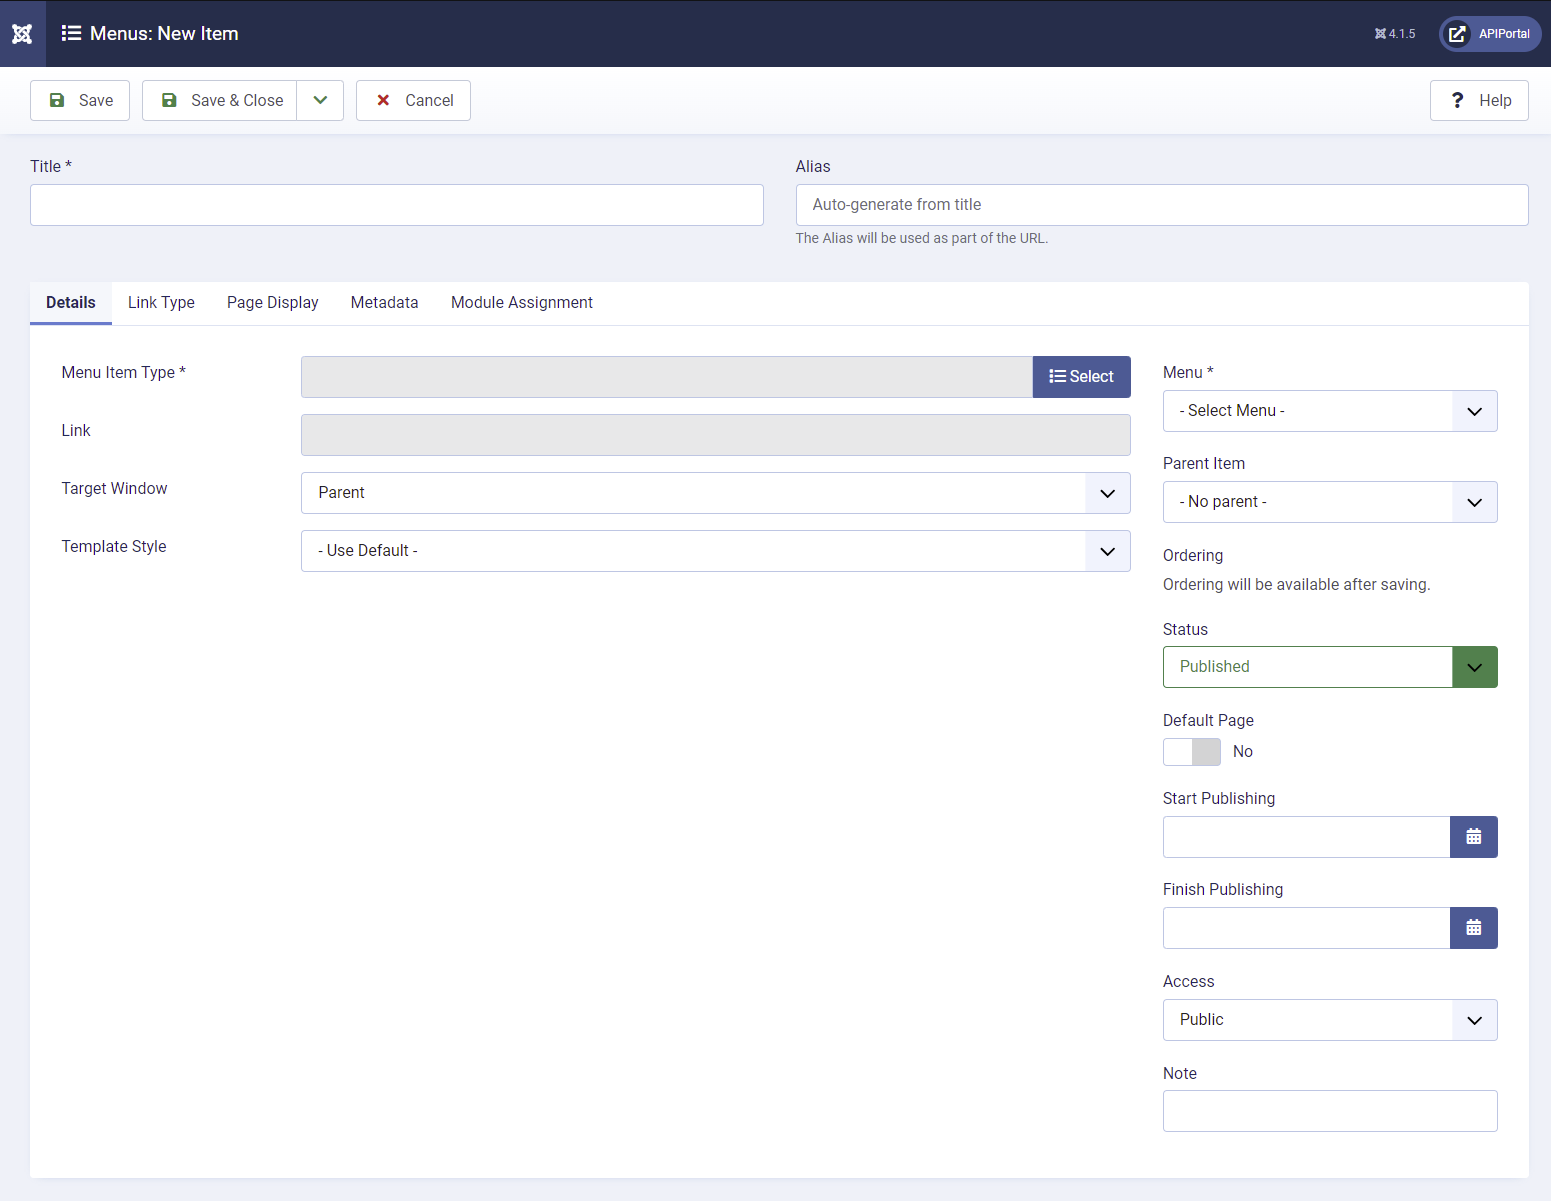
To add a menu item to this main menu, click Menus > All Menu Items > New.
-
Follow steps 2 to 4.
Change the language of the original main menu to English
Next, change the language of the original main menu items from All to English:
- In the JAI left menu, click Menus and select
Main Menu. - To change the language of all the menu items at once, click the Check All Items check box and click Batch.
- In Set Language, select
English. - Click Process.
- In the JAI left menu, click Menus and select
Main Menu. - To set the default home page, click the star in the row for the Home menu item.
Create a main menu for the new language
Next, create a main menu for each new language and clone the menu items from the main menu. Follow these steps:
- In the JAI left menu, click Menus > Manage > New.
- In Title, enter the title to be shown in drop-down lists (for example,
Main menu - FR). - On the Details tab, in Menu Item Type, enter a system identifier for the new main menu (for example,
mainmenufr). - Click Save & Close.
- In the JAI left menu, click Menus and select
Main Menu. - To clone all the menu items at once, click the Check All Items check box and click Actions > Batch from the Actions dropdown list.
- In Set Language, select the correct content language (for example,
French (FR)). - In To Move or Copy, locate the correct main menu for the language and select Add to this menu.
- Select Copy to make a copy of the menu items.
- Click Process.
- In the JAI left menu, click Menus and select the main menu you cloned the menu items to (for example,
Main menu - FR). - To set the default home page, click the star in the row for the Home menu item.
Rename the original main menu
Finally, rename the original main menu:
- In the JAI left menu, click Menus > Manage.
- Select the row for the main menu and click Edit.
- Change the Title to
Main menu - EN. - Click Save & Close.
Create page template styles
To enable a language switcher, you need to have template styles for each language you are providing (including one for English), and an additional template style for all languages.
Duplicate the template style for the new language
- In the JAI left navigation menu, click System > Site Templates Styles.
- Click your template style (for example,
purity_III - Default) to open it. - Click the arrow next to the Save button at the top left of the window, and select Save as Copy.
- Edit the Style Name to indicate the language (for example,
purity_III - Default - French). - Select the respective language as the Default. This sets this template as the default for pages using the selected language.
- Click the Navigation tab, and change the Menu to the correct main menu for the language.
- Click the Assignment tab, and assign the menu items from the correct language to the template. To select or deselect all menu items, click the toggle button next to the main menu title.
- Click Save & Close.
Duplicate the template style for all languages
Next, repeat steps 2 to 8 of Duplicate the template style for the new language to duplicate the template style for all languages (for example , purity_III - Default - All).
Update the original template style for English
Finally, edit the original template style for the English language:
- Click your template style (for example,
purity_III - Default) to open it. - Edit the Style Name to indicate the English language (for example,
purity_III - Default - English). - Select English as the Default. This sets this template as the default for pages using the English language.
- Click the Navigation tab, and change the Menu to
Main menu - EN. - Click the Assignment tab, and assign the menu items from the English language to the template. To select or deselect all menu items, click the toggle button next to the main menu title.
- Click Save & Close.
Enable the language switcher
Follow the next sections to enable the language switcher accordingly with the template you have configure in your portal.
T4 Page Builder Template
To enable the language switcher, complete the following steps:
- In JAI, from the left navigation menu, click System > Site Modules, then click New.
- Click Language Switcher.
- Enter a Title, and for Position select
Language Switcher. - Click Save & Close.
- From the left navigation menu, click System > Plugins and ensure the System - Language Filter plugin is enabled.
- Click the System - Language Filter plugin to open it.
- Set Automatic Language Change to
No. - Click Save & Close.
The language switcher is now available on the header of each API Portal page. For example:
Purity III
To enable the language switcher, complete the following steps:
- In JAI, from the left navigation menu, click System > Site Modules, then click New.
- Click Language Switcher.
- Enter a Title, and for Position select
Purity iii > Footer 1. - Click Save & Close.
- From the left navigation menu, click System > Plugins and ensure the System - Language Filter plugin is enabled.
- Click the System - Language Filter plugin to open it.
- Set Automatic Language Change to
No. - Click Save & Close.
The language switcher is now available on the footer of each API Portal page. For example:
