Customize CSS styles
4 minute read
You can directly edit the files in local/less/themes/<your copy of axway theme> to customize your CSS styles. This folder contains all files related to your API Portal theme. Alternatively, you can use a custom CSS file, rather than manually editing the Less files. For details, see Add a custom stylesheet.
Edit CSS files directly
There are several items you can change within your CSS, and the file you must edit depends on the element and the change in question. For some elements, you may need to edit more than one file for the changes to take effect.
Caution
It is strongly recommended that you make a copy of the theme you want to change before making any edits. For more details on copying a theme, see Create a new theme.In this example, the font in the main menu is changed to uppercase.
Check the current CSS
When planning changes to CSS files, you can quickly check which file controls the changes to the element you want to change.
- In API Portal, right-click an element in the main menu, such as APIs, and select Inspect element.
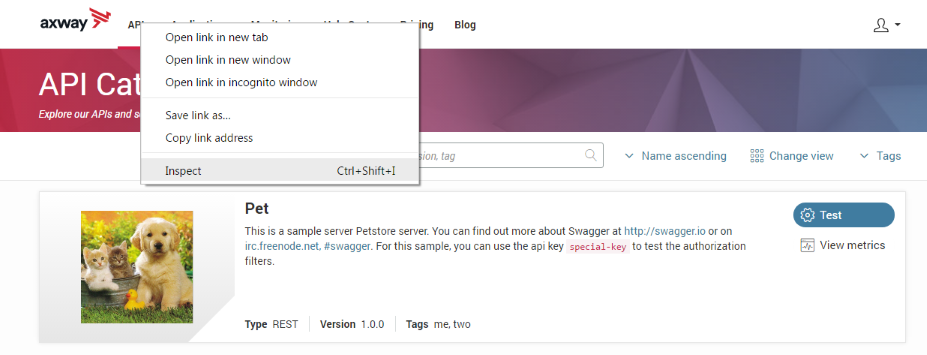
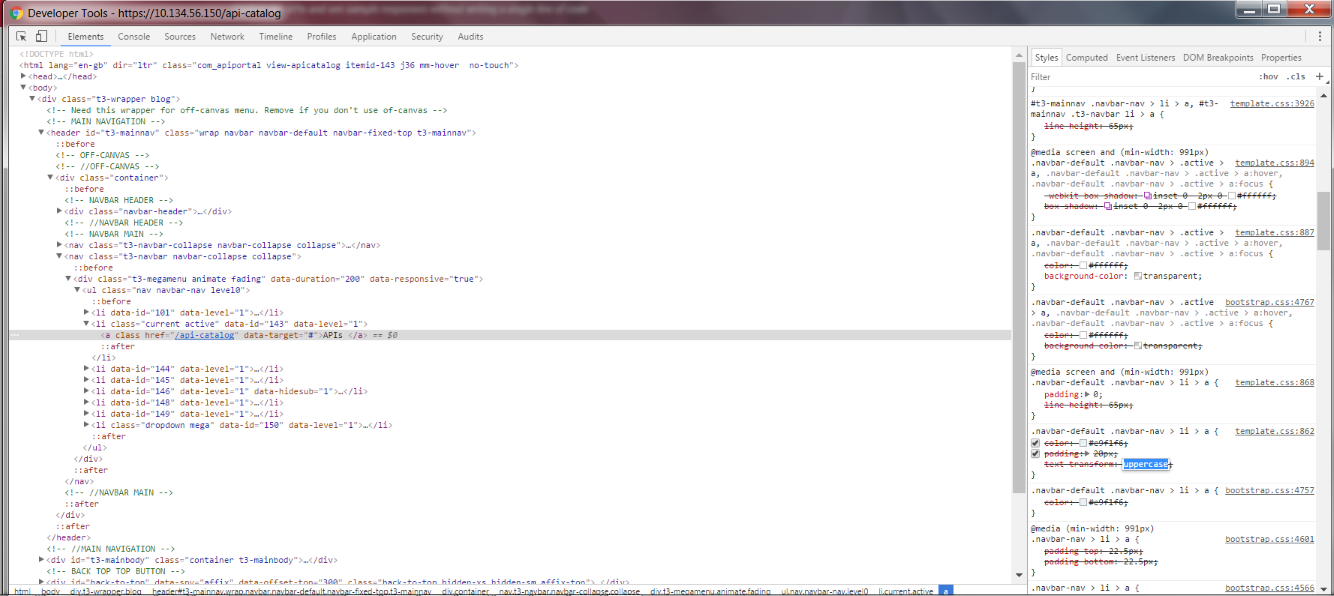
- Using the developer tools, find the style element you want to change. The CSS file reference for the element shows you the name, class, or ID of that element as well as where it is located.
Manually edit the Less files
Warning
It is not recommended to manually edit theless/themes/axway/variables-custom.less file. This file contains the attribute values customized in the ThemeMagic editor. For more details, see Customize with ThemeMagic.
-
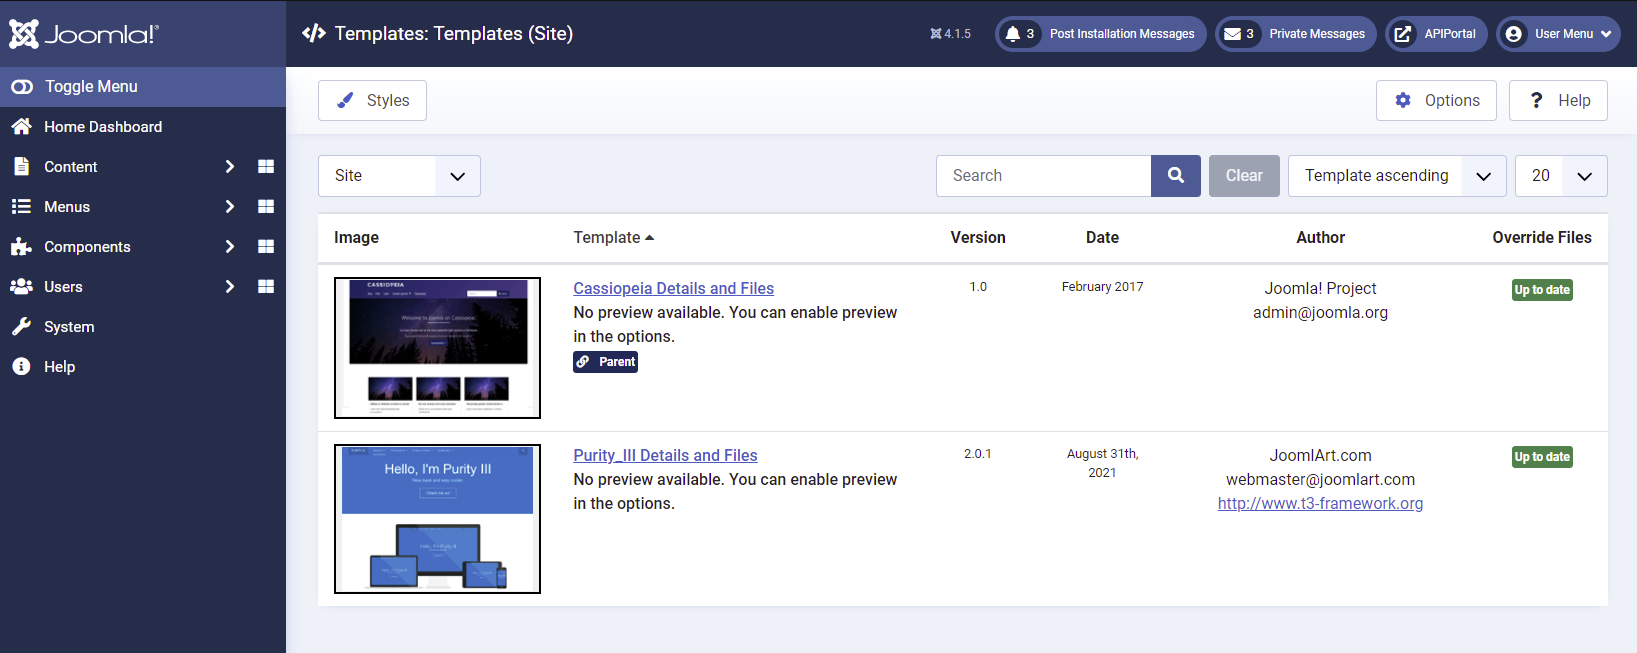
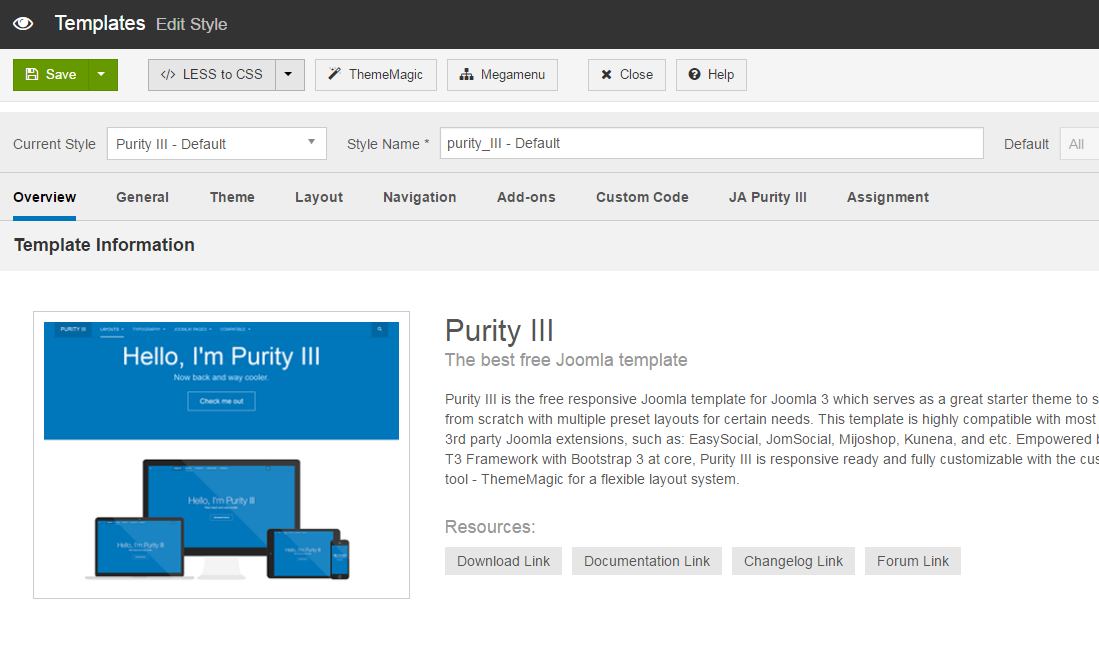
Log in to the Joomla! Admin Interface (JAI), and click System > Site Templates.
-
Select Purity III_Details and Files.
-
On the Editor tab, open the following folder:
local/css/themes/<your theme> -
Select the
template.lessfile containing the element, and locate the correct line. In this example, the value fortext-transformis changed frominherittouppercase.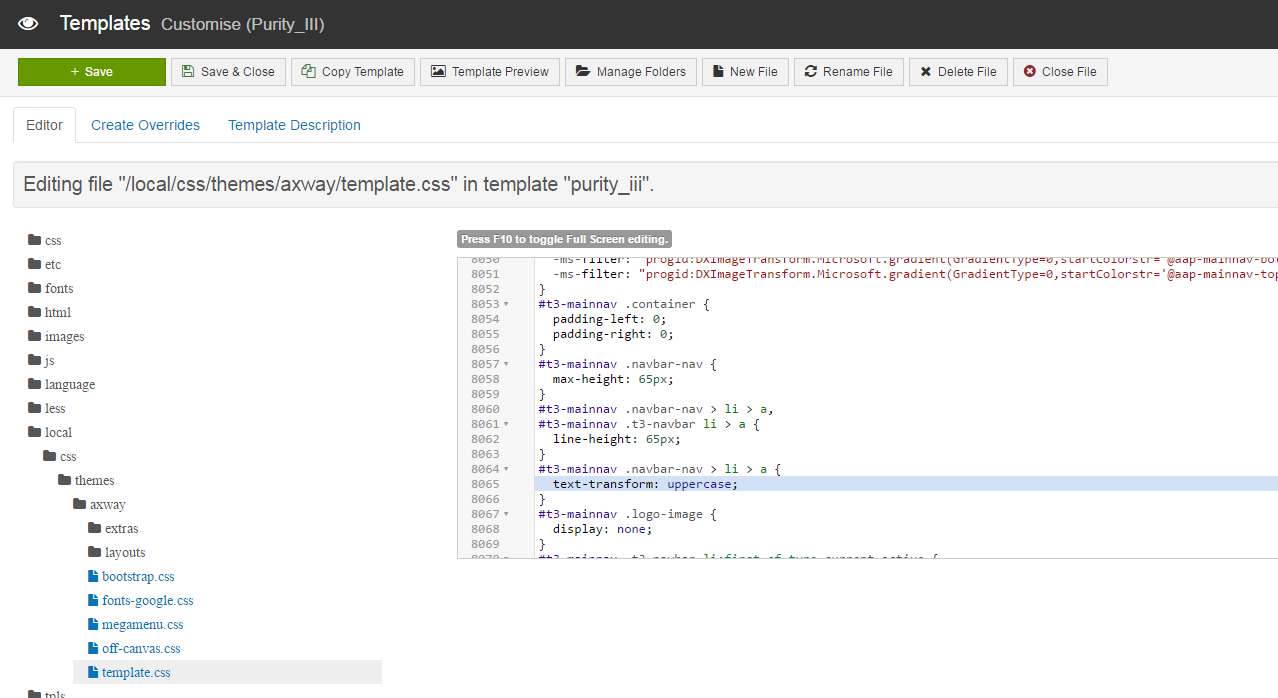
-
Select Save > Close File, and close the editor.
-
In Templates sidebar, select Styles.
-
Select Purity III - Default, and click </> LESS to CSS to compile a new css file.
-
Refresh the API Portal home page in the browser to see your changes.
Add a custom stylesheet
If you prefer to use a CSS file to edit the look and feel of your page, add a new custom stylesheet or upload an existing one to the Purity III - Default style.
The custom CSS file is the last file to be loaded in your site. The custom CSS file is not compiled from the Less variables, so it is not overridden or lost if you decide compile another CSS file using the Less variables.
Create or upload a custom stylesheet
- Log in to Joomla! Administrator Interface (JAI), and click System > Site Templates.
- Click Purity III_Details and Files.
- Click New file.
- Select the
cssfolder, set File Type tocss, enter a name for you file (such ascustom.css), and click Create. To upload a CSS file, click Choose File, select the CSS file, and click Upload.
You can now edit your custom stylesheet in JAI like any CSS file.
Copy a custom stylesheet
You can also copy a CSS file already included in the Purity III - Default style as your custom stylesheet.
- In JAI, click Sysytem > Site Templates.
- Click Purity III_Details and Files.
- On the Editor tab, open the
cssfolder, select the CSS file to copy, and click New file. - Select the
cssfolder, enter a name for your copy (such ascopied-custom.css) in Copied File Name, and click Copy File.
You can now edit the details in your copied custom stylesheet.
Add Less functionality to a custom stylesheet
If you need the Less functionality in the custom stylesheet as well, create a less file for your custom CSS file. This less file compiles the Less variables to your custom CSS file.
- In JAI, click Sysytem > Site Templates.
- Click Purity III_Details and Files.
- Click New file.
- Select the
lessfolder, set File Type toless, set File Name to<your css file name>.less, and click Create.
Note
Styles defined incustom.less are independent of the template’s stylesheet and do not render with updated variable values in ThemeMagic’s preview.