API Gateway as an OAuth 2.0 resource server
9 minute read
Resource server policies and filters
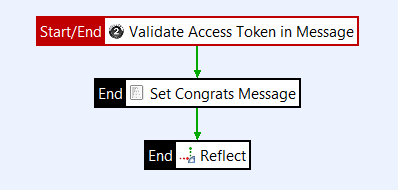
API Gateway provides a sample Resource Service policy that is exposed by the OAuth 2.0 Services listener on the path /api/oauth/protected. The Resource Service sample policy contains a Validate Access Token filter, which is responsible for validating the access token.
When an HTTP request for the protected resource comes into the listener, this request contains an Authorization Header containing the access token string. The Validate Access Token filter takes the access token string and looks it up in a token store. The token information returned from the store contains the scopes that were issued for this token, its expiry time, the ID of the resource owner, and the Client ID of the application for which it was issued. It also contains any additional information specified at token generation.
The filter checks that the token has not expired and that the token scopes match the scopes required. If the token has expired or the scopes do not match, the filter will fail. Otherwise, it will pass and the request can continue to be processed.
The Validate Access Token filter does not take into account the access rights of the resource owner or the HTTP verb used, only that the token has the required access (scopes). These considerations are intentionally left open for policy developers to manage as per their application’s requirements. For example, a successfully passing filter will set the authentication.subject.id to that of the resource owner who originally authorized the token, and a subsequent filter could decide if the resource owner has individual rights to the resource, or the resource can be modified to represent a user specific resource.
Scopes defined in the filter can use selectors. This can be useful to tie the validation of a token to a request specific attribute, such as the HTTP verb. A filter scope defined as ${http.request.verb} would ensure that the access token must have a scope called POST when the request is a POST, GET when the request is a GET, and so on. However, this type of configuration must be considered when defining the client application in the Client Application Registry, as to be able to request a token with scopes like POST and GET those scopes must be available to the application. For more information, see Register and manage OAuth client applications.
Create custom OAuth protected resources
Protected resources are created in Policy Studio by simply adding a Validate Access Token filter to a policy that is reachable through a path in a listener. The following steps show an example of creating a suitable policy:
- Create a policy called
Protected Resource. In the Policy Studio tree, right click Policies and select Add Policy. - Drag and drop a Validate Access Token filter from the OAuth 2.0 filter category onto the policy canvas.
- To configure the filter select the OAuth access token store against which the token value will be checked, and specify the scopes that must be associated with the token for the filter to pass. The following example specifies
scope.WRITEand${http.request.verb}as the scopes. You can also change the expected location of the token string. This is typically in the Authorization Header, but nonstandard locations are also supported.

After you have created the policy, you can expose it on the existing path, /api/oauth/protected, or you can create a new path.
Register and manage OAuth client applications
Note
If you have installed API Manager, you can register and manage client applications in the API Manager web interface instead of the Client Application Registry.Client applications that send OAuth requests to the API Gateway’s authorization server must be registered with the authorization server. This section describes how to register and manage client applications (and the scopes they can access) using the Client Application Registry web-based interface.
Manage client applications in the Client Application Registry
API Gateway provides the Client Application Registry web-based interface for managing client applications. API Gateway also provides the Client Application Registry REST API to enable you to manage client applications on the command line.
You can access the Client Application Registry web interface at the following URL:
https://localhost:8089
Note
You must perform the steps described in Set up API Gateway OAuth server (for example, enable the OAuth endpoints and import or migrate client applications) before you can manage client applications using the Client Application Registry.Log in using the Client Application Registry user name and password.
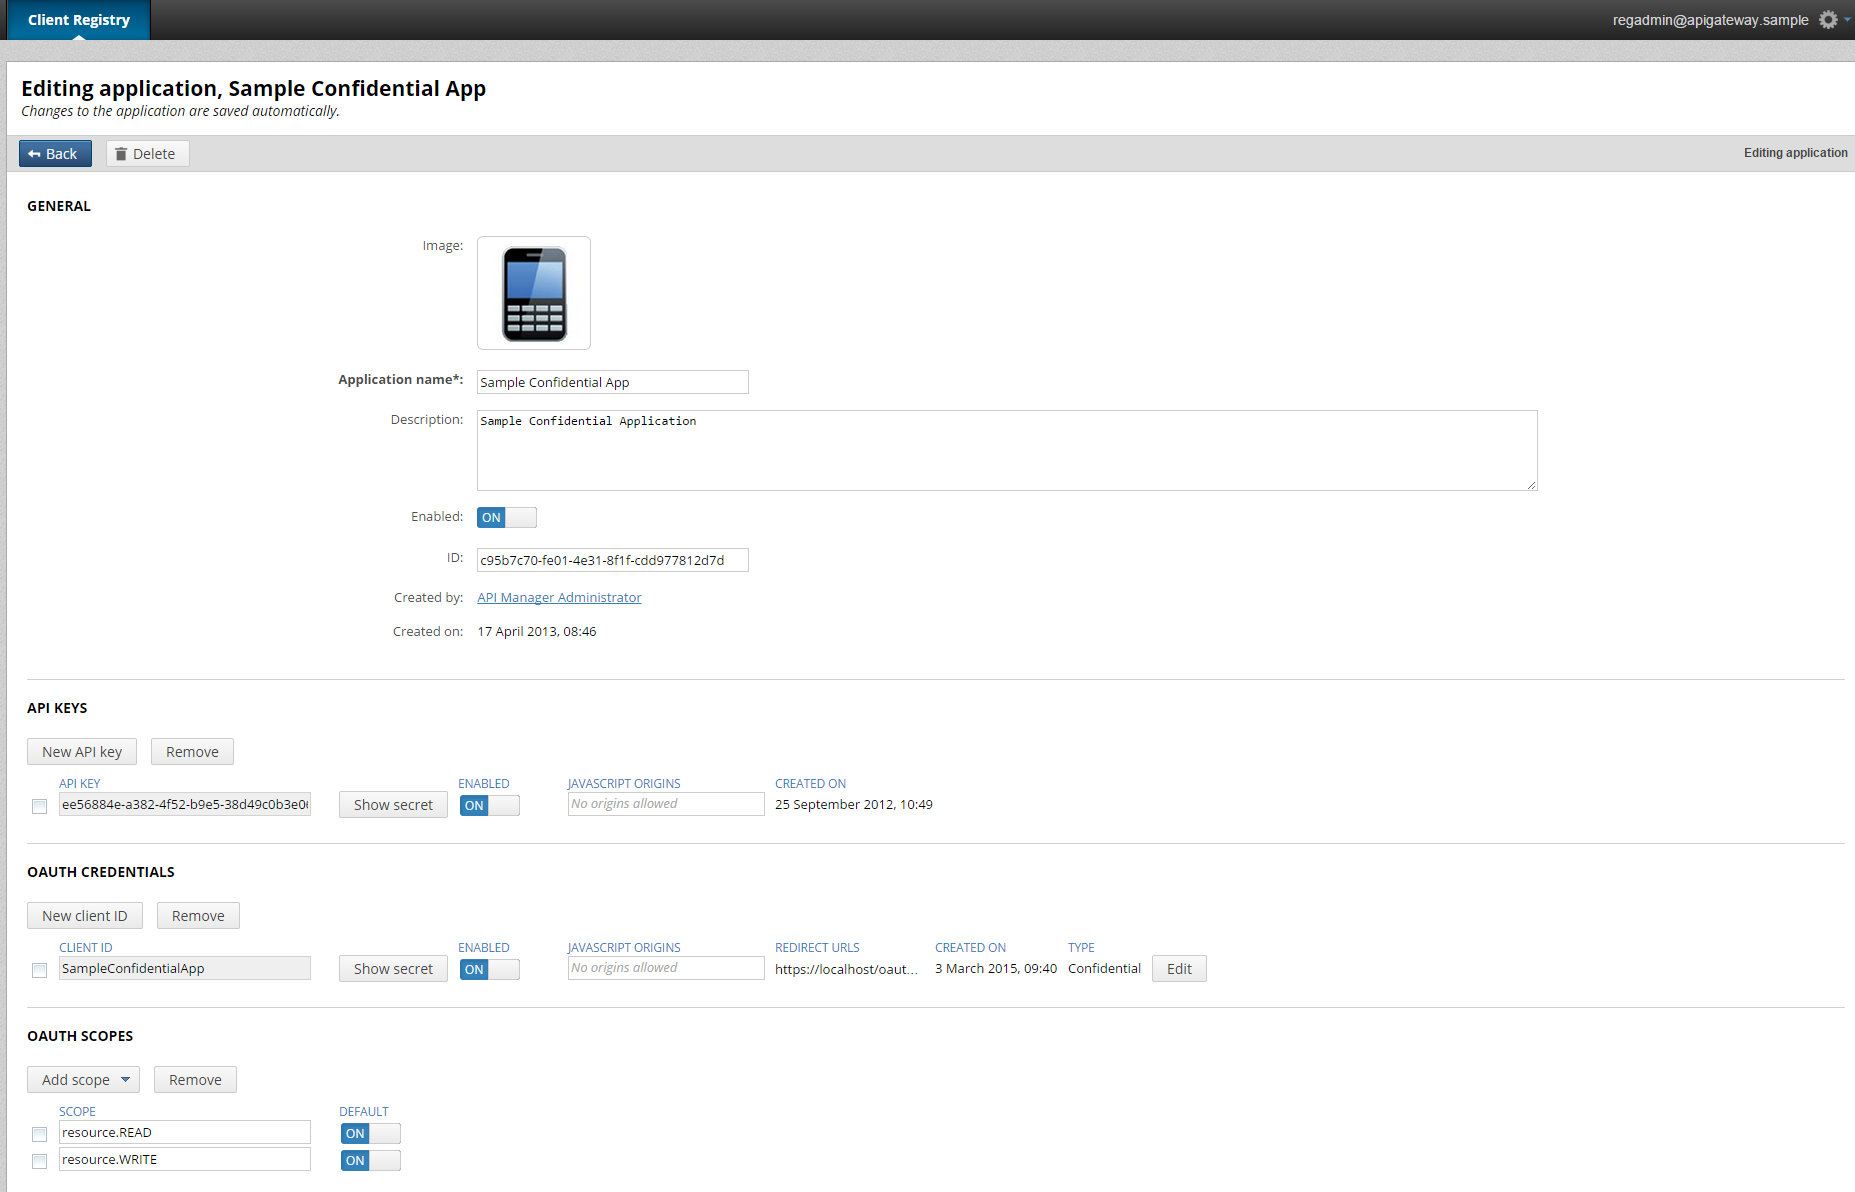
To register a new client application, click the New application button.
To edit an existing client application, click the application name in the list of applications. You can add API keys, OAuth credentials, and OAuth scopes for the application. For more information on OAuth scopes, see Manage OAuth scopes in the Client Application Registry.
Scopes in API Gateway
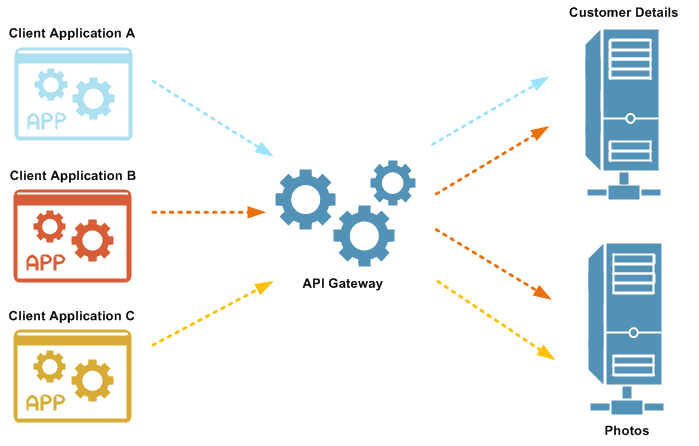
An OAuth scope is a text string used to control access to protected resources. The resource that the scope is associated with determines the meaning of the scope. For example, if a customer_details scope is associated with a particular resource, and a client application is associated with the customer_details scope, the client application will have access to that resource. Client applications and resources can have multiple OAuth scopes.
For example, in the following overview diagram:
- Client application A can access the
customer_detailsscope. - Client application B can access the
customer_detailsandphotosscopes. - Client application C can access the
photosscope only.
In API Gateway, a global OAuth scopes model is used:
- Scopes are defined in policies.
- There can be 1…N listeners routing to 1…N policies. There is no explicit URL to scope mapping defined, instead it is implicitly determined by the listener to policy routing.
- Scopes can be dynamically defined and assigned to registered client applications in the Client Application Registry.
- Supports default scopes, which are scopes assigned if no scopes are requested in the authorization request.
Note
This scopes model is also supported in API Manager. For more details, see Scopes in API Manager.Manage OAuth scopes in the Client Application Registry
You can configure the scopes that a client application can access in the Client Application Registry web interface. When editing the client application, select the Authentication tab. In the OAUTH SCOPES section you can specify scopes as free-form text or select a scope from a list of known configured scopes. You can also select a scope as a default scope for the client application. Default scopes are used when an authorization or token request does not contain scopes. The full list of scopes (default and non-default) represents the list of scopes that can be included in an authorization or token request.
Tip
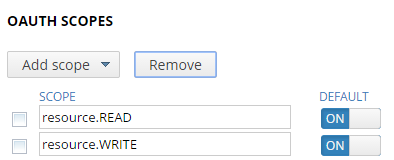
In general, good OAuth design involves a finite number of OAuth scopes. You should decide on the set of scopes to be used in your system instead of creating too many scopes later on.The following figure shows the default scopes for a client application:
You can specify any text string for an OAuth scope (for example, customer_details
or readonly).
When an authorization code or access token request is received from a client application, the API Gateway OAuth access token filters check that the scopes in the message match the scopes configured for the client application. If no scopes are provided in the message, the filter creates an access token for the scopes that are configured as default. The scope for which the access token was created is checked against the list of available scopes in the Client Application Registry web interface. This list is generated from the scopes defined in the Validate Access Token filter in the server configuration.
You can also specify OAuth scopes using selectors (for example, use ${http.request.verb}
to map HTTP GETand PUT requests). However, the Client Application Registry web interface does not display selectorized scopes in the list of available scopes. This is because selectorized scopes in the Validate Access Token filter cannot be evaluated at registration time.
The administrator must therefore find out about any selectorized scopes to be applied to resources at runtime. If a scope must be configured using a selector, the administrator must find out exactly which selector to specify in the scope.
Client Application Registry storage and settings
By default, OAuth client application data is stored in a Key Property Store (KPS) backed by an Apache Cassandra database. For more details on KPS, see the API Gateway Key Property Store User Guide. For more details on Apache Cassandra, see Administer Apache Cassandra.
Relational database-backed Client Application Registry
The Client Application Registry KPS can also be backed by a relational database such as Oracle, MySQL, IBM DB2, or Microsoft SQL Server.
OAuth relational database schemas
The OAuth relational database schemas can be found in the following directory in your installation:
INSTALL_DIR/apigateway/system/conf/sql/
Data security
If you have set an encryption passphrase for API Gateway, the OAuth secret and API secret are encrypted in the Client Application Registry.
If you change the encryption passphrase at any point, you must re-encrypt the data in the Client Application Registry or you will not be able to connect to the Client Application Registry web-based interface.
To re-encrypt the data, use the kpsadmin tool, and select the option to Re-encrypt All. This re-encrypts all data in all tables in a collection. You are prompted for the old passphrase (needed to decrypt the data). The data is then re-encrypted with the current API Gateway passphrase. Repeat this process for each KPS collection.
For more information on the kpsadmin tool, see the API Gateway Key Property Store User Guide.
Client Application Registry authentication settings
You can configure the Client Application Registry authentication settings in Policy Studio. Click Environment Configuration > Server Settings In the Policy Studio tree and select Security > Client Application Registry.
You can configure the following fields in the Authentication Settings section:
Circuit for authentication:
Select a policy to use to authenticate the user. If you have deployed the OAuth server components, a sample policy Client Registry AuthN-AuthZ is provided. This policy authenticates the user credentials against the local user store and sets two required attributes on the message whiteboard, which are used to complete authentication and authorization process.
Subject:
Enter a selector for the message attribute that contains the user ID (for example, ${authentication.subject.id}).
Role:
Enter a selector for the message attribute that contains the user role (for example, ${authentication.subject.role}).
Email:
Enter a selector for the message attribute that contains the user email (for example, ${user.email}).
You can configure the following fields in the Cookie Settings section:
Cookie Name:
Name of the session cookie. Defaults to CLIENTREGISTRYCOOKIE.
Cookie Path:
Path value for the Set-Cookie header. Defaults to /.
Cookie Domain:
Domain value for the Set-Cookie header.
Cookie Max Age: The length of time until the cookie expires. Defaults to 1 day.
Secure:
Select the check box to add a secure flag to the Set-Cookie header.
HttpOnly:
Select the check box to add a HttpOnly flag to the Set-Cookie header.
SameSite:
Select the value of the SameSite attribute of the Set-Cookie header. Possible values for the flag are:
- Strict: Prevent the cookie from being sent by the browser to the target site in all cross-site browsing contexts, even when following a regular link. This is the default value.
- Lax: Provides a reasonable balance between security and usability for websites that want to maintain user’s logged-in session after the user arrives from an external link
- None: No protection. The browser attaches the cookies in all cross-site browsing contexts.