Get started with KPS
4 minute read
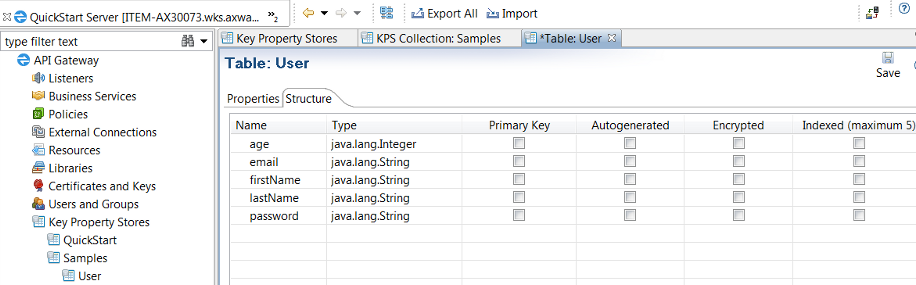
The final structure of the example KPS table in Policy Studio is as follows:

This table structure is described as follows:
| Column | Type | Description |
|---|---|---|
| age | java.lang.Integer | User age. |
| java.lang.String | User email address. This is selected in Policy Studio as a unique Primary Key, which is indexed implicitly by default. | |
| firstName | java.lang.String | User first name. |
| lastName | java.lang.String | User surname. |
| password | java.lang.String | User password, which is selected as Encrypted in Policy Studio. |
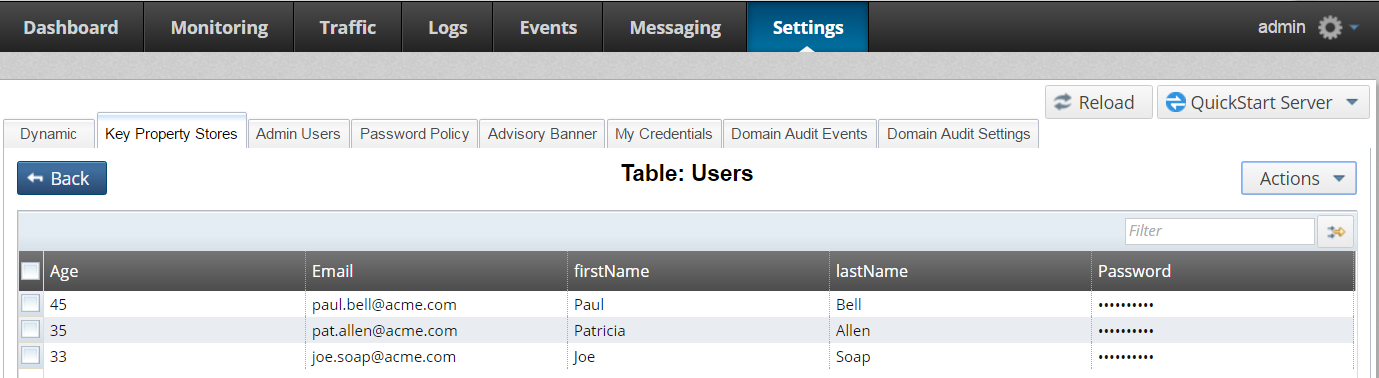
Example table data is displayed on the Settings > Key Property Stores tab in the API Gateway Manager web console:
Before you begin
The following prerequisite steps apply to this example:
- Ensure that an API Gateway and an Admin Node Manager are running.
- Start Policy Studio, and connect to the Admin Node Manager.
Define KPS configuration with Policy Studio
The main steps for configuring KPS tables in Policy Studio are as follows:
Step 1: Define where data will be stored
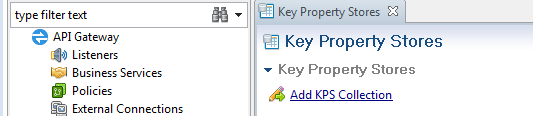
You must first create a KPS collection in which to store the KPS table configuration. Perform the following steps:
-
In the Policy Studio tree, select Environment Configuration > Key Property Stores, then select Add KPS Collection.
-
In the Add KPS Collection dialog, enter a name to the collection, for example Samples, and select Cassandra from the Default data source list.
Leave the Alias prefix field blank.
Step 2: Define the KPS table
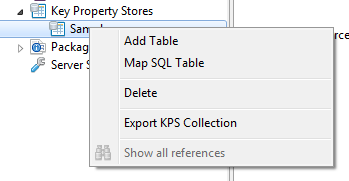
To create a table, perform the following steps:
-
In the Policy Studio tree, right-click the newly-created Samples collection, and select Add Table:
-
In the dialog, enter a Name (for example,
User) and provide a Description. -
Click Add to assign an alias of User to this table. A table must have at least one alias.
-
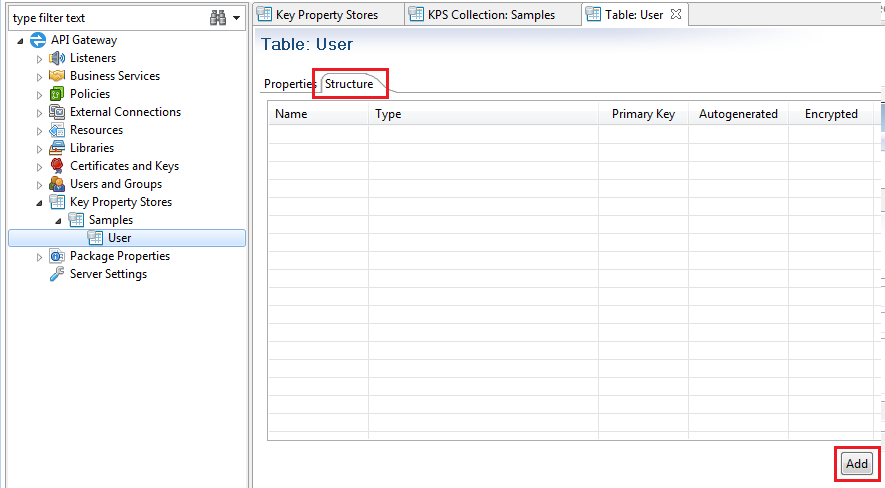
Next define the table structure. This consists of the table columns and the data type stored in each column. Select the User table and Structure tab, and click Add:
-
Repeat to add the following columns for your table structure in the Add Property dialog:
- password
- firstName
- lastName
- age
agehas an Integer (numeric) Type. All the other columns are String. For more details, see KPS table structure. -
When you select the User table, you should have the following structure:
-
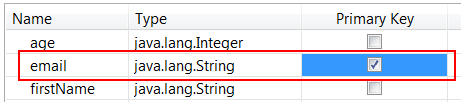
You want the email field to be the primary key for the table, so select Primary Key for this field.
-
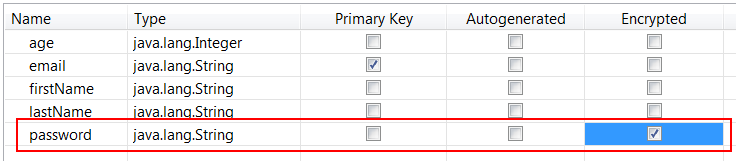
You want the password field to be encrypted when stored in the data source, so select Encrypted for this field.
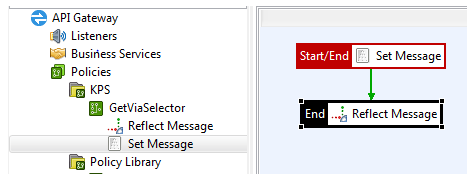
Step 3: Define a policy that accesses the table
To define a test policy that accesses the table, perform the following steps:
-
Add a test policy with a Set Message filter from the Conversion filter category.
-
Right-click the filter and set it as the Start filter for the policy.
-
Enter a filter Content-Type of text/plain.
-
Enter the following Message Body for use in the policy:
========================
User
===
Email: ${kps.User[http.querystring.id].email}
First Name: ${kps.User[http.querystring.id].firstName}
Last Name: ${kps.User[http.querystring.id].lastName}
Age: ${kps.User[http.querystring.id].age}
========================
Note
Add a Reflect Message filter (Conversion category) to return a successful HTTP response status of200. -
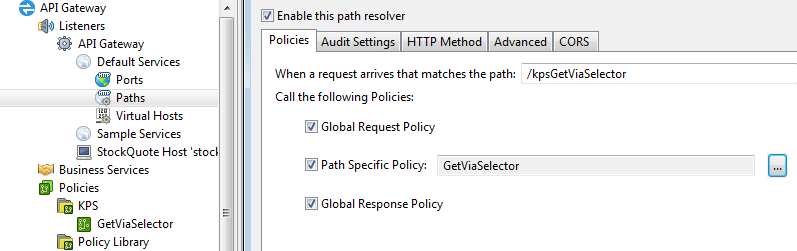
Set up a path to this policy. In this example, the path is
/kpsGetViaSelector:
Step 4: Deploy the configuration
When you are finished with your configuration changes, you must deploy them to the API Gateway. To deploy the new configuration, click Deploy in the Policy Studio toolbar:

This pushes the configuration to the API Gateway group.
Tip
If you deploy an incorrect configuration (for example, specify an incorrect primary key, property type, or name) you can use thekpsadmin command to drop the table in storage. For more details, see Manage KPS using the kpsadmin tool.
Add KPS data using API Gateway Manager
You can use API Gateway Manager to populate the User table with data.
For example, perform the following steps:
- To access API Gateway Manager in your browser, go to
https://localhost:8090. - Select the Settings > Key Property Stores > Samples > User table.
- To enter new records, select Actions > New Entry on the right.
- Click Save to save a record.
For example, the table should look as follows:
Access KPS data from a policy
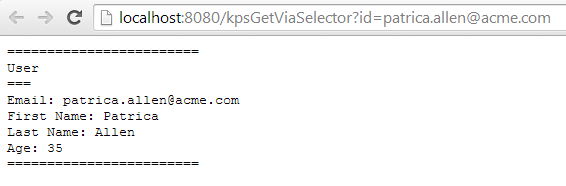
To access KPS data from a policy, go to the following URL in your browser:
http://localhost:8080/kpsGetViaSelector?id=patrica.allen@acme.com
This URL specifies the user ID (email) as patrica.allen@acme.com
You must specify an email that exists in your data. For example:
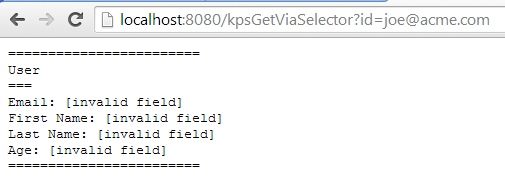
Note
If you enter an email that does not exist, you will see[invalid field] results. For example:
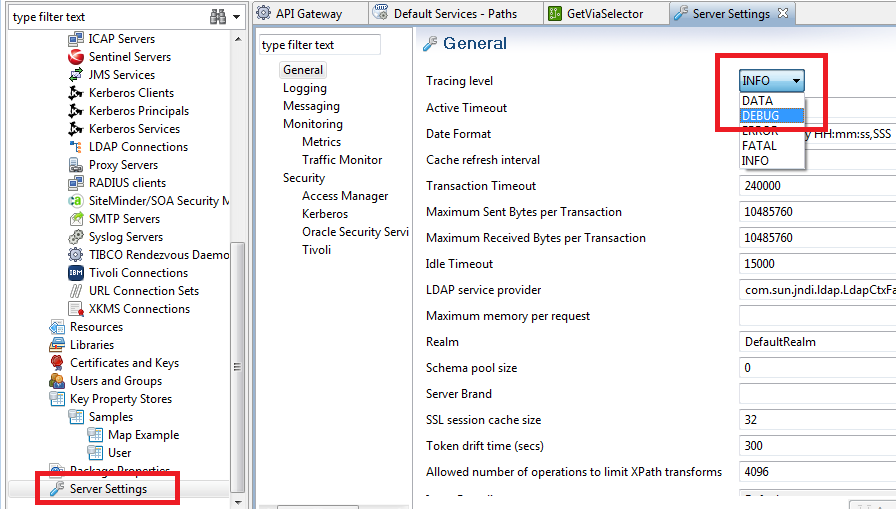
Enable API Gateway tracing
To enable API Gateway debug tracing, perform the following steps in Policy Studio:
- In the tree on the left, select Environment Configuration > Server Settings > General.
- Select a Tracing level of DEBUG.
- Click Save.
- Click Deploy.